Disclosure: BestFishingReviews.com earns a small commission on purchases made through links in this article at no extra cost to you.
Nothing kills a fishing trip faster than a reel spooled wrong. You cast, and the line comes off in coils. You hook a fish, and the line twists itself into a bird’s nest. Or you run out of line 20 yards short of capacity and lose the long-cast advantage you paid for. All of that is preventable — and spooling a spinning reel correctly takes about ten minutes once you know what you’re doing. This guide walks you through the whole process, from tying the arbor knot to filling to the right level, and covers the key differences between spooling monofilament and braided line.
See current price & availability on AmazonCheck on Amazon →What You’ll Need Before You Start
You don’t need much gear, but having the right stuff on hand makes the job cleaner and faster. Grab your spinning reel, your new line, a pair of scissors or line cutters, and a damp rag or paper towel. That’s the bare minimum. If you’re spooling braid, you’ll also want a short section of monofilament for the backing and a strip of electrical tape (more on that in a minute).
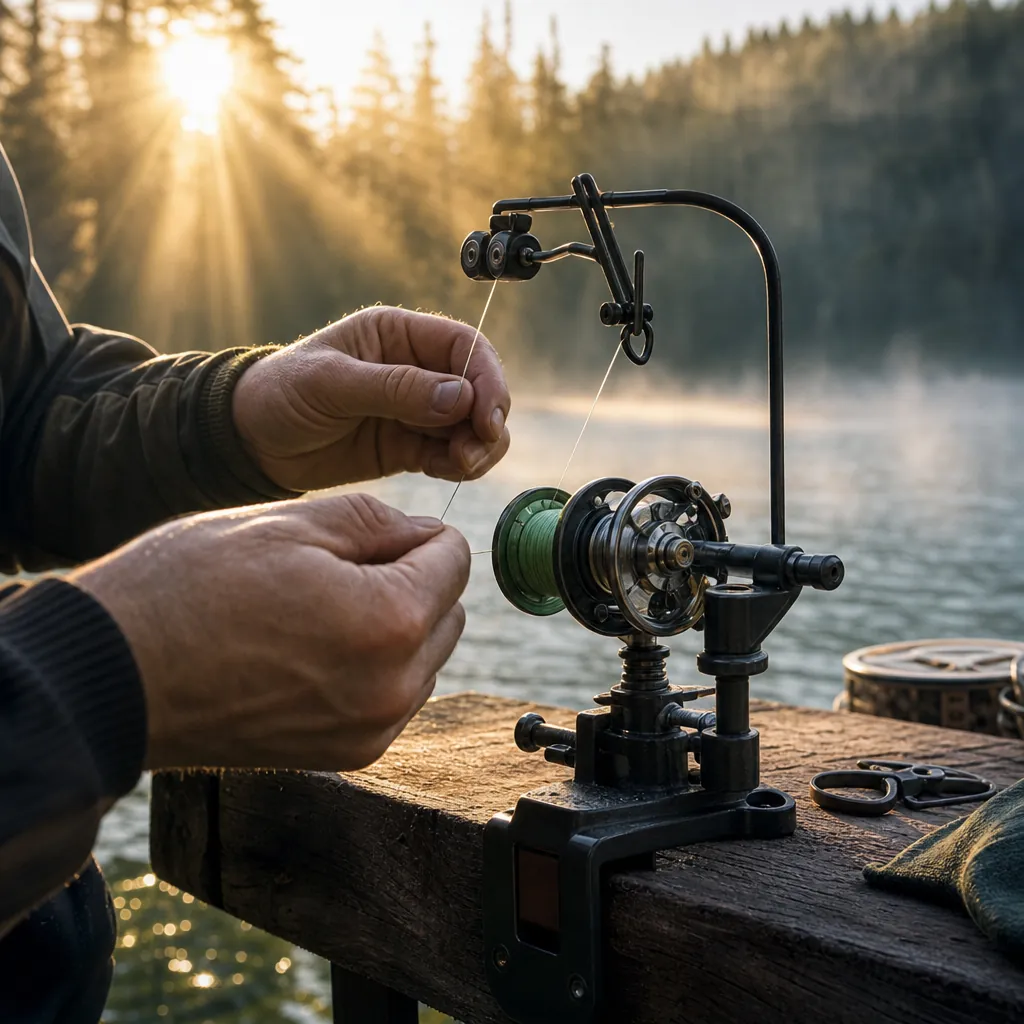
One tool worth adding to your kit if you spool more than one or two reels a year is a dedicated spooling station. It holds the filler spool under tension while you crank, which is the single biggest factor in preventing line twist and loose, spongy wraps. A good one like the Berkley Line Stripping and Spooling Station runs under twenty bucks and pays for itself the first time it saves you from re-spooling a backlash-prone reel. Clamp it to a table or workbench, feed your line through the tension guides, and you’re set up like a pro.
Step 1 — Tie the Arbor Knot
The arbor knot is the knot that attaches your line to the spool itself. It’s simple, it’s reliable, and there’s no good reason to use anything else here.
How to Tie It
- Open the bail on your spinning reel.
- Run the tag end of your line around the spool arbor (the center post inside the reel).
- Tie a simple overhand knot around the standing line with the tag end — this is your main knot.
- Tie a second overhand knot in the tag end itself, about an inch down from the first. This stopper knot keeps the first knot from slipping.
- Wet the knots, pull the standing line to cinch everything down tight against the arbor, and trim the tag end close.
Give it a firm tug. It should grip the arbor without sliding. Close the bail and you’re ready to spool.
Step 2 — Orient the Filler Spool Correctly (This Is Where Most People Go Wrong)
This step is what separates anglers who wonder why their line always twists from anglers who never think about it. On a spinning reel, the line comes off the reel spool in loops — not off the end like a baitcaster. If your filler spool is oriented so the line unspools in the opposite rotational direction, you’re building twist into the line with every single crank.
Here’s the easy check: lay the filler spool flat on the floor or a table with the label facing up. Now reel a few cranks. Watch how the line comes off the filler spool. It should come off in the same rotational direction that your reel’s bail is laying it down. If you see the line immediately forming loose coils or corkscrewing, flip the filler spool over so the label faces down and try again. One of the two orientations will cause significantly less twist — stick with that one.
The “label up vs. label down” rule you’ll see online is a starting point, but the only rule that actually matters is matching the rotational direction. Check it visually every time, because different reel brands have different bail rotation directions.
Step 3 — Apply Tension and Fill the Spool
Loose line on a spinning reel is a problem that compounds itself. If the first layers go on soft, everything stacked on top embeds into them under load, and you get the dreaded line-digging-under-itself tangle. You want consistent, firm tension the whole time you’re spooling.
If you’re using a spooling station, it handles tension automatically. If you’re doing it by hand, run the line between two fingers on your non-cranking hand and apply light pressure — firm enough that you can feel resistance, but not so hard you’re stretching monofilament. Pinch it with a damp rag or paper towel to protect your fingers on long spooling sessions.
Reel slowly and evenly. Check your wraps every twenty or thirty cranks to make sure the line is laying down flat and tight without gaps or piling up on one side. Most reels oscillate automatically, but keep an eye on it anyway.
How Full Is Full? The 1/8-Inch Rule
Stop filling when the line sits about 1/8 inch (roughly 3mm) from the outer lip of the spool. That’s close enough to maximize casting distance — underfilling by even 1/4 inch creates more friction at the lip and noticeably reduces how far you can cast. But overfilling past the lip means line spills off in loops on every cast, creating instant tangles. The 1/8-inch gap is the sweet spot. Look at the spool edge straight on while you reel; when you can just see a thin band of spool showing above the line, you’re there.
Spooling Monofilament vs. Braided Line — Key Differences
The basic process is the same, but mono and braid have different properties that require a couple of adjustments.
Monofilament
Mono has memory — it wants to hold the shape of whatever spool it’s been sitting on. Spooling cold mono straight from the package in winter can mean more coil problems off the bat. A quick fix: soak the filler spool in warm (not hot) water for a few minutes before you spool. It relaxes the line and reduces memory significantly. Quality monofilament also matters here — cheap mono has worse memory and degrades faster in sunlight. Beyond that, mono grips the arbor knot fine on its own, so no backing is needed.
Braided Line
Braid has almost zero memory, which is great for casting, but it creates two problems on a spinning reel. First, it’s slick — an arbor knot in straight braid will spin freely on the spool instead of gripping, which means your drag does nothing until enough braid piles up to create friction. Second, that slickness means braid can cut through itself under load if the wraps aren’t tight and uniform.
The fix for both problems is a mono backing. Spool 20–30 yards of monofilament first, tie the braid to the mono with a uni-to-uni knot or an Albright knot, then continue spooling braid to the 1/8-inch mark. The mono grips the arbor and gives the braid something to bite into. Some anglers also wrap two or three layers of electrical tape around the arbor before tying the mono — overkill for most, but bulletproof for heavy drag situations.
When you’re shopping for braided line for spinning reels, look for a braid specifically labeled for spinning — some braid is rounder in cross-section and lays down better on spinning spools than flat or fused lines designed for baitcasters.
Common Mistakes
- Skipping the filler spool orientation check. This is the number-one cause of line twist. Take the thirty seconds to verify rotational direction before you spool a hundred yards of line onto a reel.
- Spooling without tension. Loose, spongy line is a recipe for tangles under load. Use a spooling station or pinch the line with a rag. Never just let it pile on freely.
- Overfilling the spool. Line that sits proud of the spool lip will jump off in loops on the cast. Stay at or just below the 1/8-inch gap.
- Using straight braid on the arbor without mono backing. The braid will spin on the spool and your drag won’t engage correctly until there’s enough pile-up. Always use a mono base.
- Not trimming the tag end of the arbor knot. A long tag end flapping around inside the reel can cause line catches on the first few casts. Trim it close.
- Reusing old, damaged line. If the line on your reel is more than a season old, discolored, or has visible kinks, just swap it. Fresh fluorocarbon or mono is cheap insurance against a break-off on the fish of your life.
Wrapping Up
Spooling a spinning reel right takes ten minutes and zero special skills — just the right sequence and a little attention to line orientation and tension. Nail those two things and you’ll cast farther, tangle less, and spend more time fishing instead of picking out wind knots on the water. Do it at home the night before a trip, not in the dark at the boat ramp. Your future self will thank you.